I don’t know if I’ve mentioned it before, but my family is Irish. My maternal great-grandparents immigrated here from Ireland and my paternal grandfather immigrated here from Ireland as a child. To say that St. Patrick’s Day is a big day for us would be an understatement.
When we were just out of law school Erajh and I would throw huge St. Patrick’s Day parties that would go from noon to well into the next day, often involving multiple runs to the Irish pub conveniently located across the street from our first townhouse (that’s how you know your first house together is a winner – there’s an Irish pub within walking distance). But as we had the kids, those parties were slowly phased out, in exchange for more child friendly activities. And honestly, last year, even if I could, I was still way too sick with Everett to even think about partying on St. Patrick’s Day.
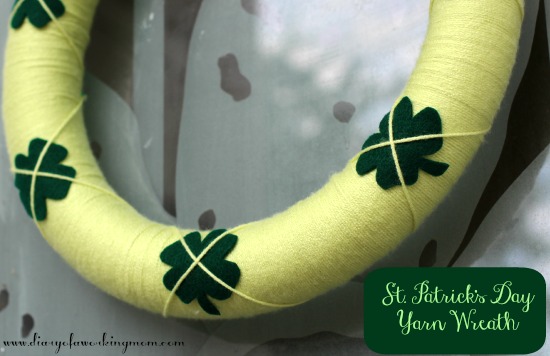
So this year I wanted to do something for the holiday – something to spruce up the house and say that we’re officially ready for St. Patrick’s Day this year – and I thought that a new wreath was the perfect way to do it! I’ve seen a lot of yarn wreaths lately and just love their sleek design, so I decided to start with yarn, adorn it with a few shamrocks, and top it off with a grosgrain ribbon hanger. The result was ridiculously simple, stylish, and very festive! It couldn’t get any greener!
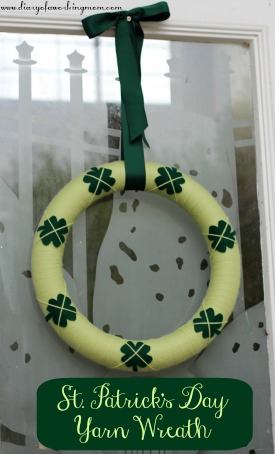
To make this wreath you will need:
14″ (or smaller) Styrofoam wreath form
Light green yarn
Dark green felt (I used the felt with adhesive on one side, but you can use regular felt)
Hot glue
Wide grosgrain ribbon
Pins
Shamrock printable (I used this one, but any will do)
Step 1 – Optional – If you’re using a large ball of prepackaged yarn from the craft store, unravel it and make it into 2 separate balls of yarn. I found that when I tried to use it straight from the package it would get tangled up. Once I did this, I saved a ton of time!
Step 2 – Wrap the wreath form in yarn. Start by pinning one end of the yarn to the form and wrapping the yarn around the form multiple times. Once you’ve wrapped it 5-8 times, pull tight, scrunch down, then repeat. Completely cover the wreath form using your 2 balls of yarn (leaving a little extra to attach the shamrocks), pinning at the ends.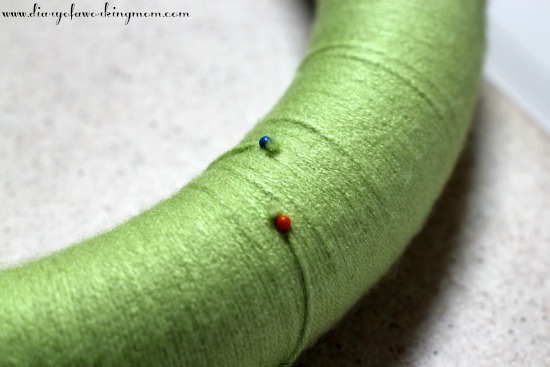
Step 3 – Trace 7 shamrocks on to felt (or in my case, on the adhesive side of the felt). Cut shamrocks out.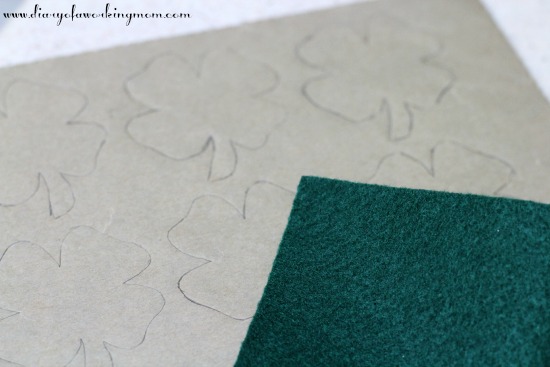 Step 4 – Attach the felt to the wreath form using tiny dabs of hot glue on the edges of the shamrocks. You don’t need a lot of glue here and you might not need any if using felt with an adhesive.
Step 5 – Cut yarn into fourteen smaller 6-10 inch segments (2 for each shamrock). Crisscross the smaller segments of yarn over the shamrocks attached to the wreath, pulling the ends and securing to the back of the wreath with pins. Trim the excess yarn to create a cleaner look. Repeat with all the shamrocks.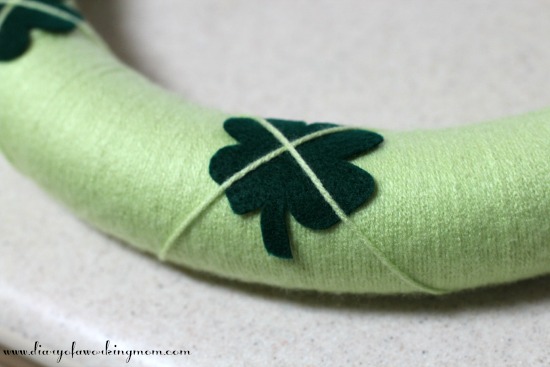
Step 6 – Loop grosgrain ribbon through the top of the wreath and tie at the top to hang it on your door.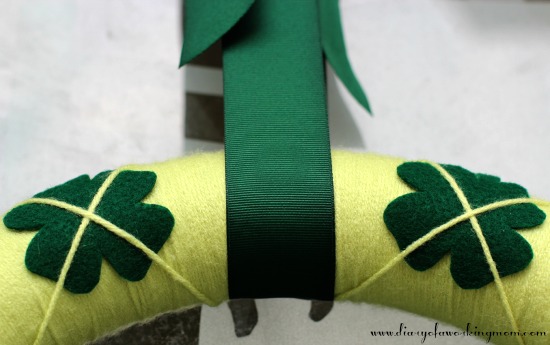 Enjoy the luck of the Irish!


I don’t know if I would have the patience to completely wrap that form in yarn but other then that this looks to be very simple to make. And I definitely like the way it looks.
This is so cute. I was searching for a St Patrick’s Day craft. Love it. AND – I love your blog header!
Oh my gosh! This is the most perfectly wrapped wreath I’ve ever seen! Wow! The closeup versions look really amazing!