Around this time last year, I made custom picture frames using scrapbook paper and Mod Podge. I couldn’t believe how easy the process was. That post was my 2nd most popular post for 2012 (right behind my hair bow picture frame) and is still going strong this year. It’s probably also one of my most pinned (and repined) posts on Pinterest.
So when I was working on my Easy Photo to Canvas Craft earlier this week, I couldn’t help but feel a little nostalgic – I mean, the process was essentially the same as those picture frames, I was just unsure if the printer paper would transfer to the texture of the canvas. In the end, the canvas wasn’t as forgiving as the wood and I wondered how a photo on regular printer paper would have transferred onto wood. And I only tried it on canvas because I didn’t have any scrap wood laying around. But then it hit me – the craft store has plaques. So armed with a coupon I headed out to my local craft store and found the perfect 8×10 plaque to do the transfer. The result turned out beautifully! 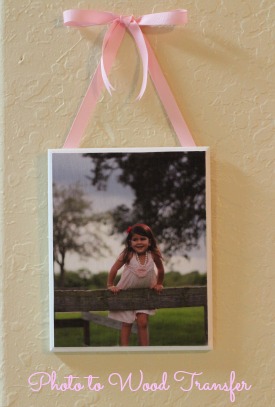
You will need:
Photo printed on regular printer paper
Mod Podge
8×10 Wood plaque (or size of your choice)
Foam tip paint brush
White acrylic paint (I use “Basics” brand and LOVE it, worth the little extra $)
Sand paper/nail file
Scissors
Ribbon
Hot glue
Credit/Debit/AAA card – basically any flat plastic card you might have in your wallet
Step 1 – Print out a picture on regular printer paper. Using scissors, trim picture down so it is just a little bigger than 8×10. Since I used a black and white picture for my canvas project, I decided to use a color picture this time (I was also determined to show you that the color of the picture is not affected by the transfer because my pictures of the canvas looked a little blue in the photos…I promise it’s not the transfer, just the bad lighting in our house).
Step 2 – Paint the wood any color you’d like, making sure to cover the sides well. Allow to dry completely.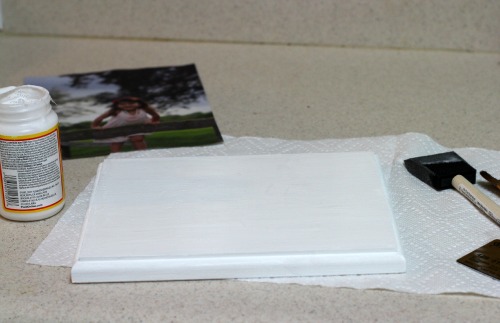
Step 3 – Cover the very top, raised portion of the plaque with Mod Podge. Careful to only cover the top; you do not want the sides covered.
Step 4 – Place the picture on top of the Mod Podge, making sure that it’s straight. You want the little extra to hang over the edges of the plaque but don’t press the edges down. 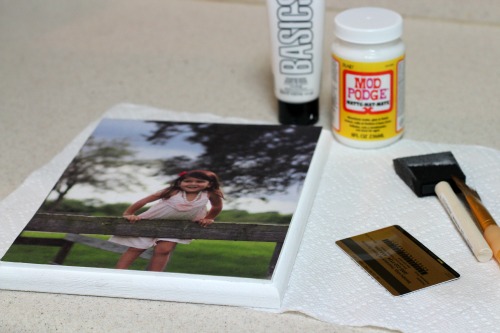
Step 5 – Using the edge of the debit/credit/AAA card, press down on the paper to smooth out the wrinkles and bubbles that may form between the picture and the Mod Podge covered plaque. Then put the card flat on the picture and continue to work any remaining bubbles/wrinkles out from under the picture. Allow to dry.
Step 6 – Sand the edges of the picture so they are smooth and straight. Brush all the excess dust off of the plaque so your surface is clean and dry.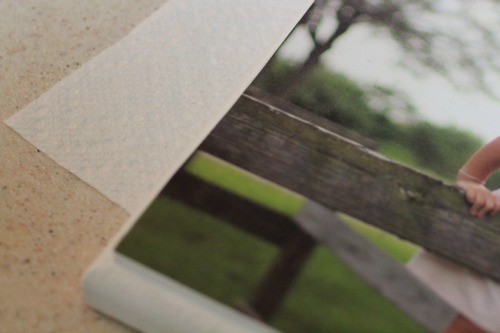
Step 7 – Cover the entire plaque with Mod Podge, sides, edges, and all (except you don’t need to do the back). Allow the Mod Podge to dry completely.
Step 8 – Turn over the plaque and, using hot glue, affix the ribbon to the back at an angle. 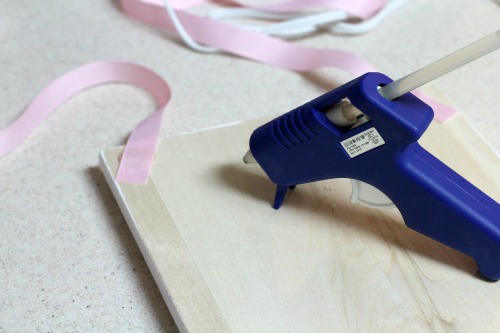 Once dry, tie a bow at the top and hang it up for everyone to see!
Another post brought to you by the awesomeness that is Mod Podge…not sponsored, I just love the stuff. And I promise, this is my last photo transfer project for a while!

Awesome craft! I think I’m just going to pin your whole sight. I wonder if I can just do an automatic pin? 🙂
Pingback: DIY Photo Wall Hanging | Whole New Leaf
I love this idea. I tried it myself for my sister-in-law’s birthday but it didn’t work out as beautifully as yours. http://www.wholenewleaf.com/2013/02/17/diy-photo-wall-hanging/ How did you get it so that your picture didn’t run when you put the Mod Podge over it? Maybe it’s my printer. Anyways love your version.
Oh no! I’m so sorry to hear that! I didn’t have problems with the colors from the picture running at all…maybe it’s my printer? I saw your post though – yours turned out great!
So you just laid the picture down face up instead of face down and it turned out this way? Every pin I’ve seen you lay the picture face down and then rub the paper off and the picture looks like it’s part of the wood, but that’s not what I’m wanting to do. I want the picture to sit on top off the wood, not blend in. Love the way yours turned out.
Hi Tammy! Yes, I laid my picture face up. Honestly, I just wasn’t completely confident in my ability to pull of the other technique that I simplified it this way. When I did this, I spread a thin layer of ModPodge on the wood, laid the picture (on regular paper) on top, pushed out the bubbles using a credit card, exacto knife off the excess, then sealed it with a layer of ModPodge, and sanded off the edges. Now, with mine there are still some bubbles visible. Not a ton, but they were there.
Another way to do this – and perhaps a perfected way to do it – might be to print out your picture on cardstock instead of regular paper. Adhere your cardstock photo to the wood using rubber cement (that would probably eliminate most of the bubbles), exacto knife off the excess, then seal with ModPodge and sand off the edges. Just a thought…
Did you try this with an inkjet printer or did you get it copied somewhere else with a laser copier? Just wondering what worked for you? 🙂
I just used our regular home printer – I think it’s an HP inkjet. I don’t think you’d need to go any place special to get it copied (unless, of course, your printer isn’t good quality). Good luck and let me know how yours turns out!
I tried it with my home printer. It’s an Hp Inkjet. The colors bled and ran together a bit. I’ll try it on cardstock next time. If that doesn’t work I guess I’ll go have some laser copies made. 🙂