For those of you who don’t know, I’m a football widow. Every year from September to the middle of December, my husband tends to disappear on Sunday afternoons…sucked into the chaos that I think that RedZone is. I mean, technically, he’s right on the couch, but mentally? He’s in Fantasy Football Land where he actually owns a team in the NFL. His team must be monitored. Their stats must be tracked. And he occasionally feels the need to give “pep talks” to the players through the tv screen.
Our kids, unfortunately, don’t have the same affection for the NFL. They’ll watch about 5 minutes of it before coming to me and asking what we’re going to do next. Last year, we did tons of outings with my mom’s group to pass the time but this past weekend, I was just too tired. Fresh off a trip to Disney last weekend and 37 weeks pregnant, this mom was exhausted. And then it rained…so any chance of taking them somewhere to run off that excess energy was automatically ruled out. Lucky for me, I had this easy 3D Rainbow Craft tucked in my bag of tricks – perfect for a rainy day!
To make this craft, you will need:
Rainbow coloring sheet you can find HERE
2-3 Sheets heavy white cardstock per rainbow (depending on the size of the cardstock – I used 2 pages of 12×12, but would have needed 3 if it were 8.5×11)
Paints in every color of the rainbow
Scissors/safety scissors
Wax paper
Paint brushes
Elmers or Tacky glue
Hot glue
Cotton balls
Step 1 – Print the rainbow coloring sheet on a piece of heavy white cardstock. Cut the rainbow into strips, according to colors in the rainbow. The lines on the coloring sheet are so wide that my preschooler was able to do this on her own using safety scissors, I just tidied up and rounded out the arches.
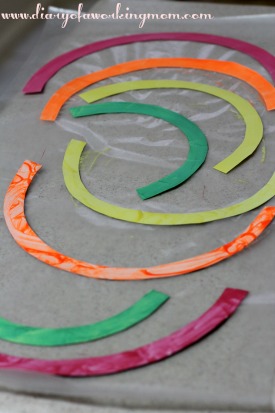
Step 2 – Paint each strip according to it’s size and place in the rainbow, painting the opposite side of the thick black lines on the coloring sheet. In other words, you’re painting the back of the coloring sheet. My girls absolutely loved this part…even my 2 year old painted. Allow to dry completely on wax paper (you might be able to skip the wax paper for this project, but I found that it was the only thing that the pieces of cardstock wouldn’t stick to, so I highly recommend it).
**Of course, you could always print the rainbow on cardstock, not cut it, and simply paint within the thick black lines, but I didn’t particularly like the thick black lines, so I cut it out. Perhaps this could also be used as a toddler project if you did it that way.
Step 3 – Once dry, place the strips of your rainbow down on another piece of cardstock. Once you are happy with the placement, glue them down one by one, starting with the red strip and then working your way down. It’s okay if the strips overlap a little, just try to avoid white space if possible. Allow to dry completely, then cut around the rainbow. Essentially, this step is giving your rainbow the backing that it will need in order to stand up since the paint can warp the pages (even if you’re going to avoid cutting strips and just paint within the thick black lines, I strongly advise that you still do this step since the paint can really weigh down the paper)
Step 4 – Using a piece of white cardstock, trace out 2 ovals – these are your clouds or the base for your clouds. Don’t be terribly concerned what they look like, because you’re just going to cover them up anyway, but try to make them look similar.
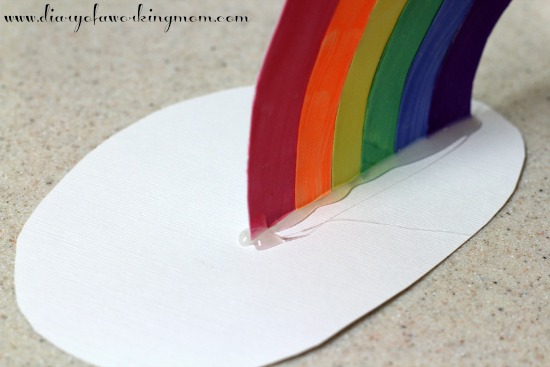
Step 5 – Using the hot glue gun and a liberal amount of hot glue, glue the white card stock ovals to the rainbow, so the rainbow stands up. If it wobbles at all, just use some more hot glue. Needless to say, I did this part.
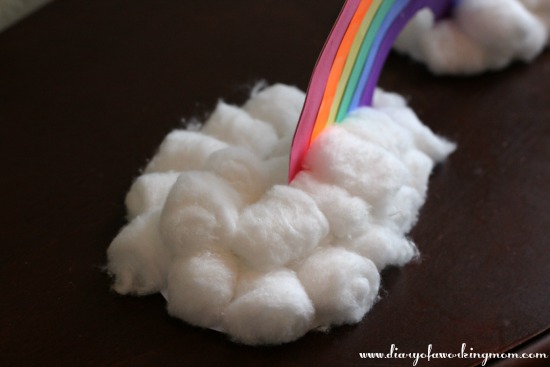
Step 6 – Once the hot glue is dry, use the Elmers or Tacky glue to glue down the cotton ball clouds. You can do this one of 2 ways – use a paint brush to paint on a thin layer of glue then attach the cotton balls OR dip the cotton balls in glue and then attach them to the white ovals. I picked the first method and Greenleigh picked the second…she pretty much thought this was the best thing ever. Be careful though, if you pick the second method, the glue might become too heavy for the cardstock causing the clouds to droop a bit. 
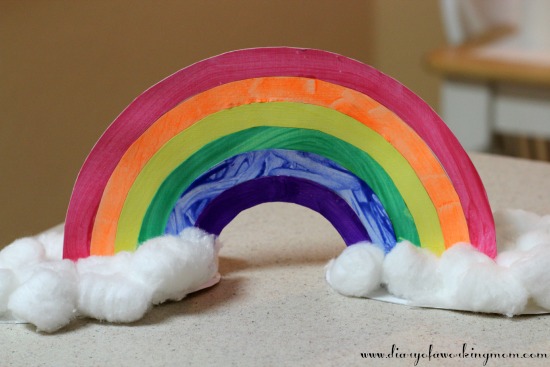
When it was all done, we had some beautiful rainbows to admire. The thing that I absolutely loved about this craft was that it took a decent amount of time, but letting the paint dry still allowed time for naps/quiet time in between steps. Although there were definite parts to this project that I needed to help her with, this is a project that a preschooler can handle. Hazeline was even able to get involved in painting and constructing the cotton ball clouds. Best of all, Greenleigh is so in love with her rainbow, she’s already designated it as her show and tell item for this week. How cool is that?
So while it might have been raining outside, it was definitely a double rainbow kind of day in our house!


This would be a great project to do with my daughter! Thanks for the great idea. 🙂
Such a cute craft project!
What a cute idea! with baby #4 arriving in December, I need to get some craft stuff together for our kids during christmas break and other times in general. this seems so simple and easy and fun to do, not to mention a very cute finished product. thanks for sharing!
Now that looks like fun! Of course I have no children to entertain with this great idea—but I can see how an adult would have to help out a wee bit (In my case the kids would probably have to help me out!)
this is such a cute craft idea! i need to make this with my daughter 🙂
My Pinterest is normally pretty quiet but the last couple days this has been repinned 10 times. Big thing for my account lol