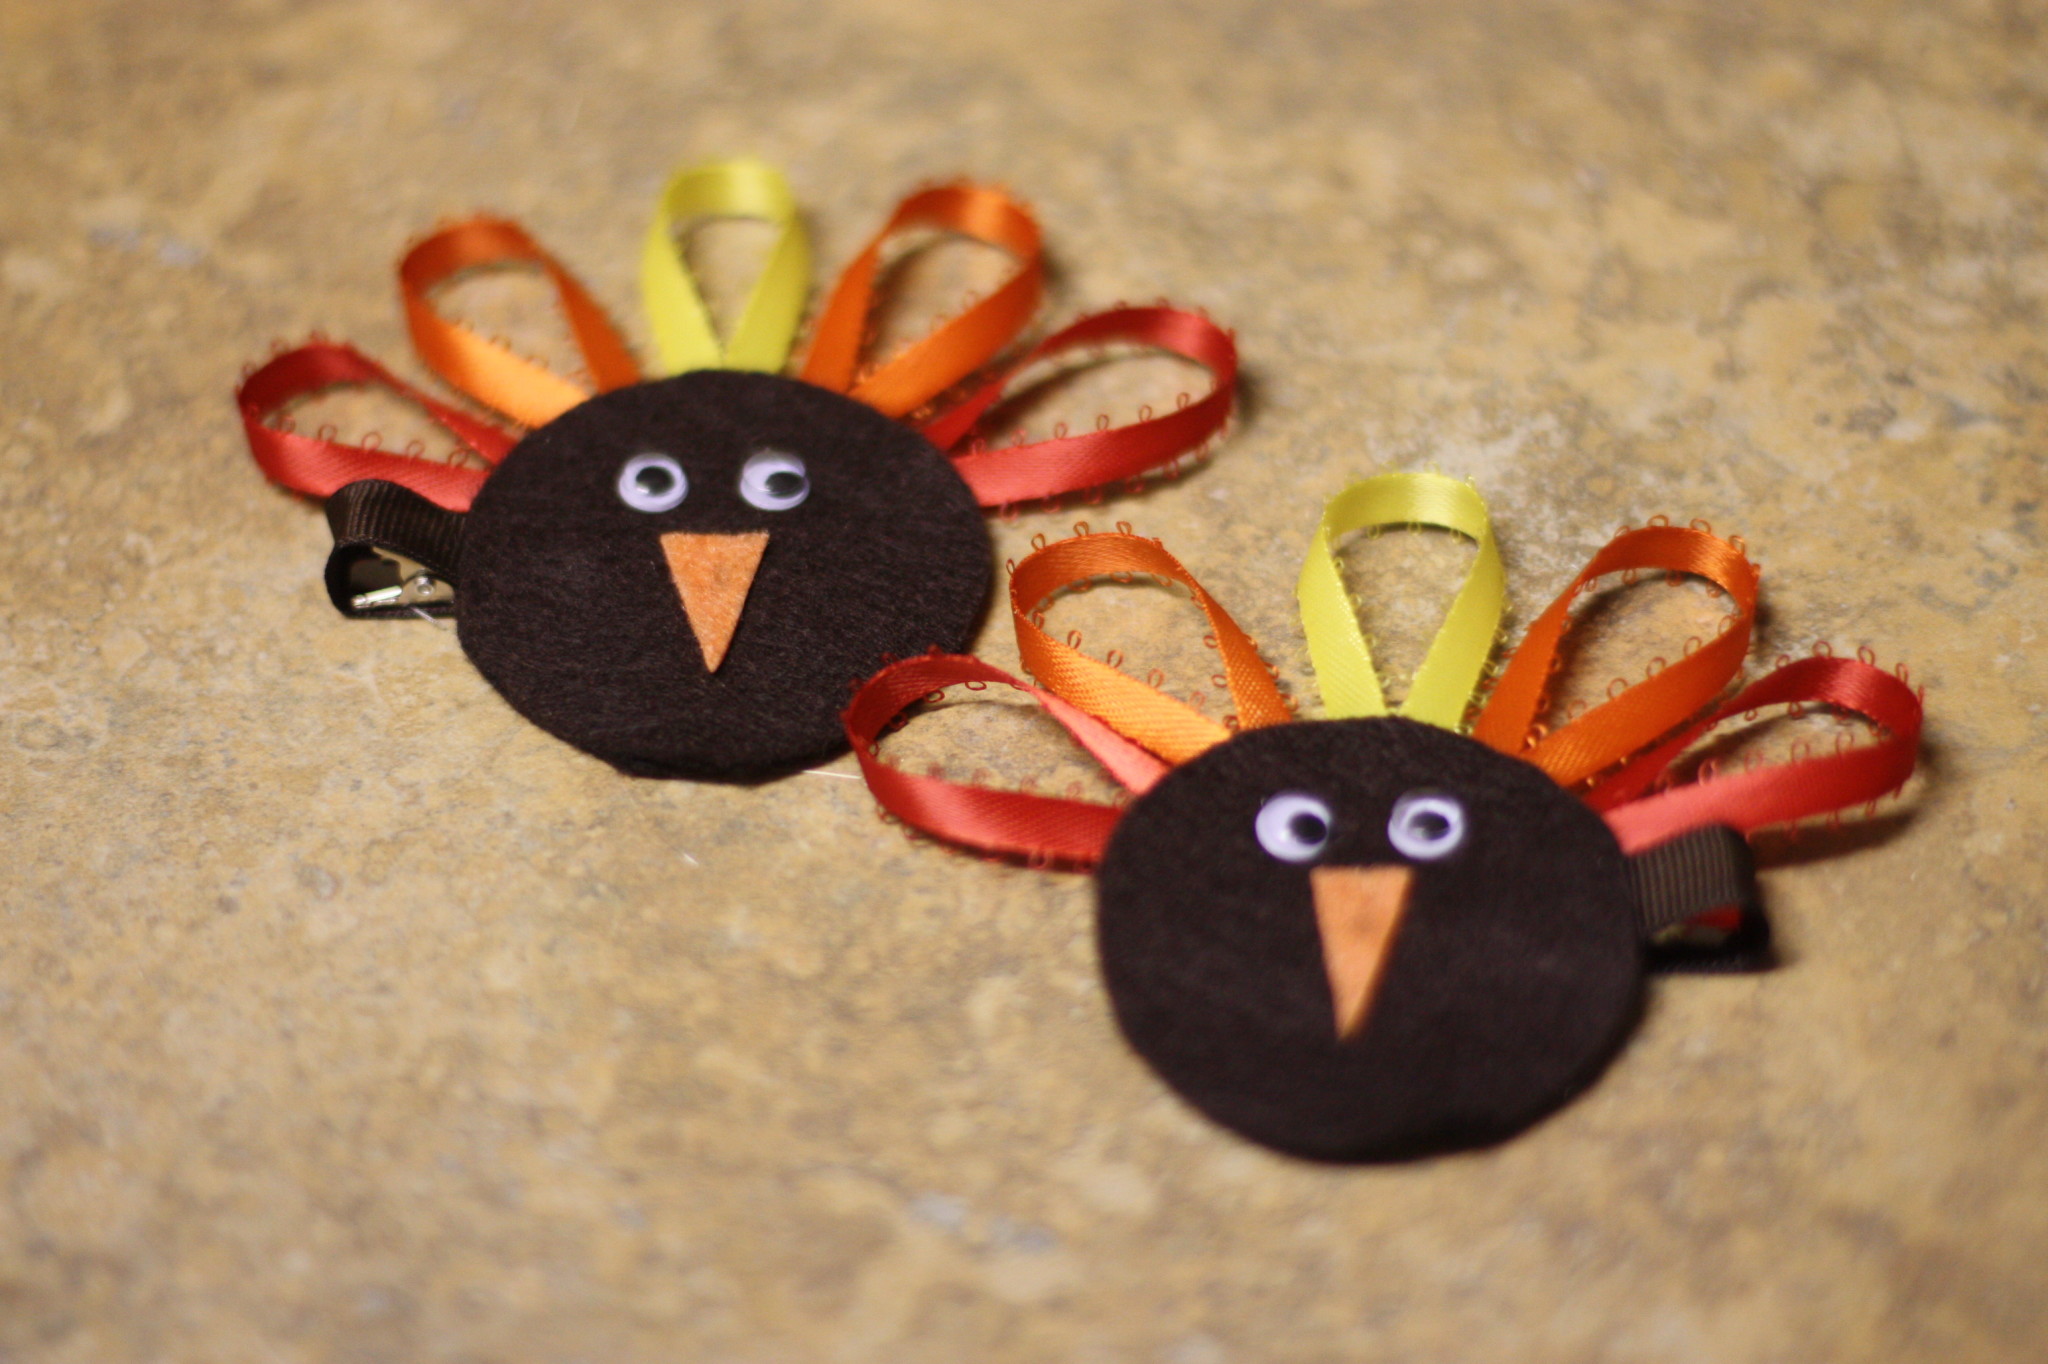
A few weeks ago I stumbled on Happy Hour Projects, and it soon turned into my new favorite craft website. Happy Hour Projects is full of creative ideas, many of which can be done in a short period of time. And, as we all know, I am always running short on time. With Thanksgiving rapidly approaching, I fell in love with these turkey hair clips and decided to make them myself. Below is how I made my hair clips (based on her tutorial), but you should definitely head over to her site and check out all of her creativity. She has such great ideas!

Photo Credit: Happy Hour Projects
What you will need:
1 piece of brown felt
1 piece of orange felt
googly eyes, 7mm size
red ribbon, 3/16” wide
orange ribbon, 3/16” wide
yellow ribbon, 3/16” wide
brown ribbon, 3/8” wide
metal single prong clips, also known as alligator clips (available at beauty supply and drug stores)
glue gun
 Step 1 – Cover the clip with brown ribbon using the glue gun, but leave the top (the angled part) of the clip uncovered. You can cover it if you find it to be easier, but it is going to be covered by the turkey anyway.
 Step 2 – Cut 2 circles out of the brown felt (4 if you are making a set of hair clips). Mine were 2 inches in diameter. To make sure that the circles were identical, I traced the circle on the felt and cut it out from there. Cut small triangles out of the orange felt. One piece of each color felt should yield several turkeys, since they are small.
Step 3 – Cut red, orange, and yellow ribbon into 4 inch segments. Twist segments so they look like this and glue at the ends.
 Step 4 – I glued the orange felt beak in the middle of one of the brown circles, and used that as the center point. I then added the feathers.
 Step 5 – Add the eyes. This was the hardest part for me because I really wanted them to be perfectly straight.
 Step 6 – Take the unused piece of felt and place it inside the alligator clip using glue.
 Step 7 – Cover the felt piece with glue and attach the turkey to the top.

These clips are so easy to make. I think it took about 20 minutes to make them both. Unlike the original post, I turned the clips to the side, instead of having them vertical, because I think that will work best for us. I also used different ribbon, but only because I couldn’t find plain ribbon.
I can’t wait for Greenleigh to wear these. Ordinarily she’s not fond of me putting things in her hair, but if I tell her how pretty she looks (over and over again) she might keep them in for a while…at least for a few pictures. I hope so, because these are adorable!
These are adorable, I love it! I think my daughter would get a kick out of them.
Thanks for the link to the site. I’m always looking for quick projects I can do with the kids. So many I find on Pinterest are complicated – and I’m a simple kind of girl lol!
How adorable! This is something I would have so loved to do for my girls. However at 23 & 21, I don’t see them wearing these. lol. What a fun, cute project! I bet your princess loved them, huh? Thanks for sharing!
Cute, cute, CUTE!
Thanks so much for dropping by the Be-Bop-A Blog Hop! I’m a follower and I hope you’ll stop by again soon! Have a great day! 🙂
http://www.mommylivingthelifeofriley.com
What a cute idea!
Am following you back via email (couldn’t see a GFC follow?)
Have a wonderful Thursday!
Linda
beachside cottage
so cute!!! i must make these!!! gonna be my weekend project 🙂 thanks for sharing!!
Those are way cute! And look easy enough for me to make 🙂 Thanks for linking up today 🙂
So cute! Thanks for coming by my blog today!
These are too cute.I am a new follower from the Blog Hop. You have such a cute blog. Can’t wait to read more.